How do you create an image gallery in WordPress without a plugin? When blogging for either personal or business use it is certain that at some point you will need to add more than one images to your posts or pages.
The good news is that you can do this in WordPress easily and without using any external plugins. WordPress has a nice and functional built-in gallery feature for adding photo galleries to your content.
Tip: If the method below does not suit your needs (for example when you want to create an animated slideshow or add sound to your gallery) you can also upload your photos to Youtube and create a nice slideshow and then embed the youtube video in your wordpress post.
How to create a photo gallery in WordPress
Let’s see how the process works with a step-by-step example.
- Login to wordpress using your credentials
- Go to Posts and select Add New to create a new post
- Enter the title and contents of the post as usual
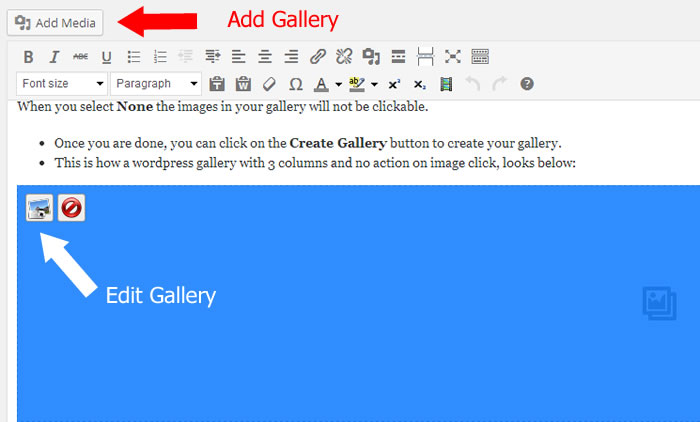
- Place the cursor where you want the gallery to appear and click the Add Media button
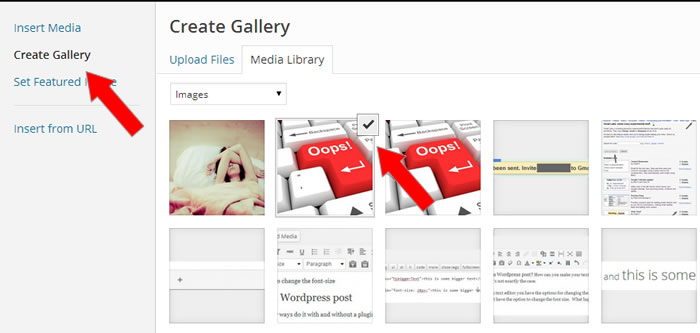
- Select Create Gallery from the left menu

Now, you can either upload the photos you want to use in your gallery form your PC or use existing images already available in the Media Library.
For our example, we will select 4 images from the media library. Notice that when you click to select an image a blue check mark appears on the top right corner of the image. To de-select an image just click on the image again.
- Once you are done click the Create a new gallery button in the bottom right corner.
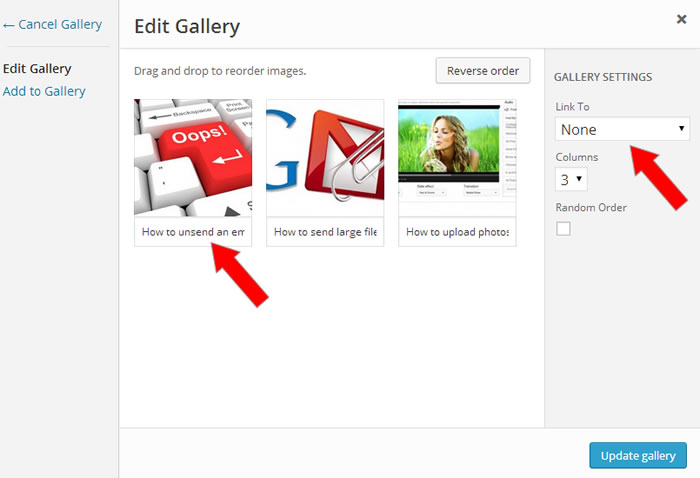
WordPress will then give you the opportunity to do a number of configurations for your new gallery like:

- Add a caption to images
- Change the order of images (you can drag and drop images and change their position)
- Select how many number of columns your gallery will have
- Select what happens when someone clicks on the images (that’s the Link To options in the top right corner) as follows:
When you select Attachment Page WordPress will create a new post page for each image and when someone clicks on the image it will redirected to that page. This is not good for SEO purposes or usability.
When you select Media File WordPress will open the image in a new window (the image file only and will not create an extra page).
When you select None the images in your gallery will not be clickable.
- Once you are done, you can click on the Create Gallery button to create your gallery.
- This is how a wordpress gallery with 3 columns and no action on image click, looks below:
Note that the settings you make to the gallery are applicable to all gallery images and you cannot have images with different settings in the same gallery. If you want the click on the images to behave differently for group of images then you can create more than one galleries.
When you go back to editing your post or page you will notice that the gallery is not shown but instead there is a large icon in the space occupied by the gallery. To view how your gallery looks you need to SAVE your work and PREVIEW in a browser.
How to edit your photo gallery? To edit your gallery, select the large icon and click the Edit gallery button. You can then add / remove images, change the order, number of columns and click behaviour as explained above.

How to remove an image from a gallery? Click the edit gallery button and then move the mouse over the image you want to delete. You will notice that an X button will appear on the top right corner. Clicking the button will remove the photo from the gallery.
A more technical way to edit gallery settings or remove an image from your gallery is to click the TEXT button in WordPress editor to view the code behind your post. You will notice the shortcode used to create the gallery has a pre-defined format. By changing the parameters and saving the code you can get to the same result as editing the gallery visually.
That’s about it, an easy and quick way to add a photo gallery to your WordPress posts or pages without using a plugin.


